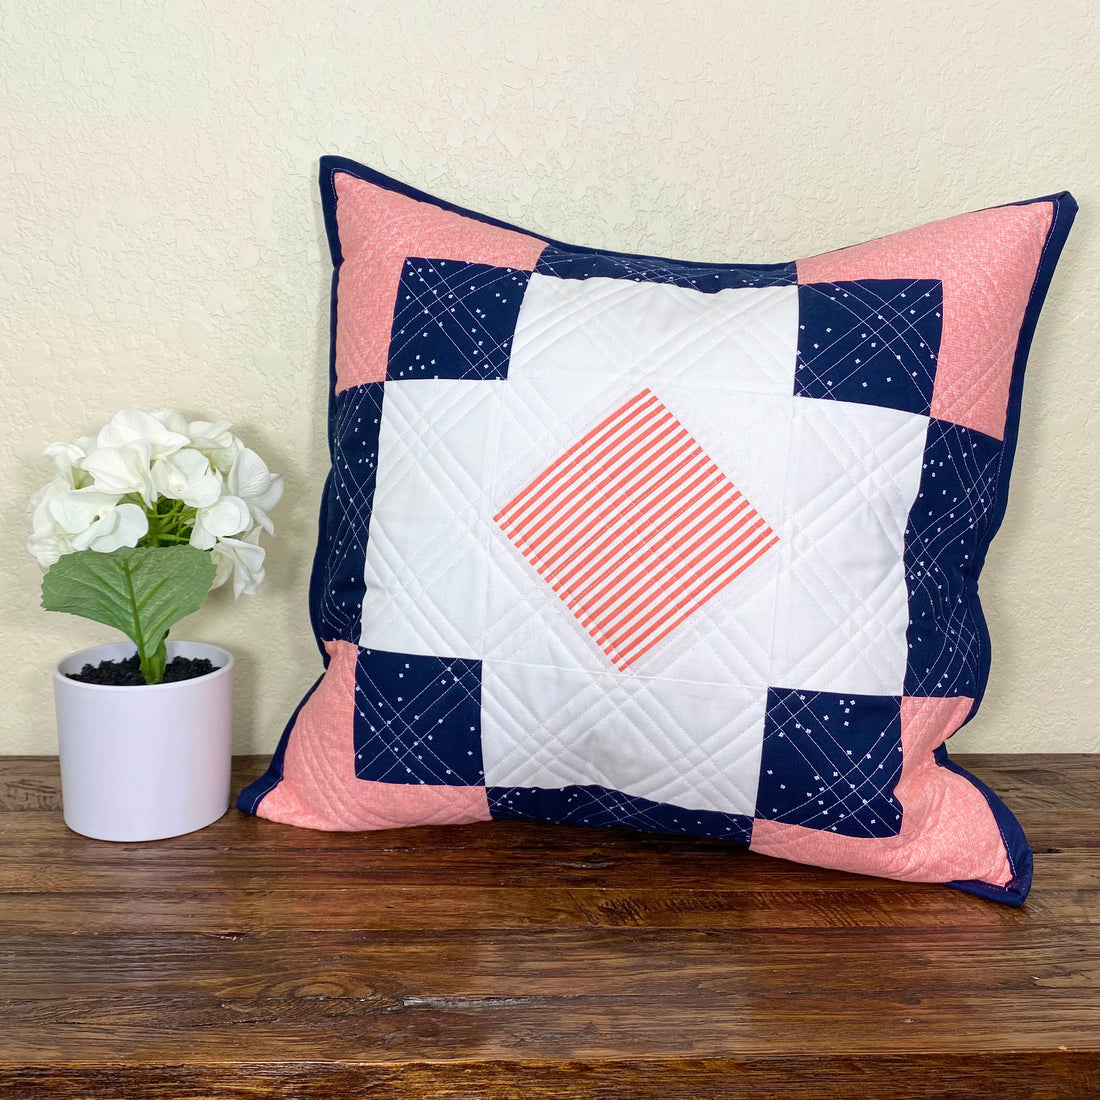
I just started a new series for 2021 called Jumbo Blocks Rock where I take traditional 12" blocks, upsize them to 18", and give them a modern twist. January's block (#1), is a remix of the traditional Antique Tile block. In case you missed that tutorial, you can find it HERE.
I decided to make a fun pillow with Block #1 using some Riley Blake Designs fabrics from their Basics lines - Hashtag, Stripes, Blossom, and Confetti Cottons solids.

I chose a sweet palette of Navy and Coral because it's just such a classic combination! I used Blossom in Navy, Small Hashtag in Coral, 1/8" Stripes in Peony, and Confetti Cottons Solids in White and Navy.
How great do these colors look together?

I love how it came out! The quilting definitely gives it an extra pop and lots of texture.


Even Bentley loves the new pillow!

When quilting, I generally try to keep it simple, so I've been trying different combinations of straight lines so they are a bit jazzier. Today I'm going to show you how I did a diagonal grid using three lines on my pillow!
TRIPLE LINE DIAGONAL GRID QUILTING TUTORIAL
1. Using a Hera marker, mark a line through the center of the block. We will work on quilting one side of the diagonal at at time.

2. Draw out evenly spaced lines from the center line. I chose 2¼" lines here because I wanted the next line to be on the outside of the center pink diamond. Stitch over the 2¼" marks.

3. Next, go back and stitch a line on either side of those lines. I did ¼" spacing here.

The easiest thing is to just follow your original center line with the edge of your foot. So, I adjusted my needle about ¼" on one side and then added my right side line. After stitching all my right side lines, I adjusted it ¼" on the other side and stitched all the left side lines.

4. Now you just repeat the process for the other side of the diagonal.


Overall it's a really easy process and you end up with an interesting quilt pattern in the end!

I tend to add a lot of quilting to my pillows, but it can get kind of stiff when you are doing an entire quilt. Not to mention that it can feel like it takes forever! If I was using this design on a quilt, I wouldn't worry about trying to get the lines in the center of one block because they probably won't be in the center of all the blocks. Just pick a point where you can sew a diagonal line through the entire quilt and mark it. Then just start marking all your lines. To reduce your total quilting, you can also go with a bigger space between lines, like 3". Then for your side lines, you might even want to go a bit bigger like 1/2".
I love making pillows because it allows me to try out new quilting designs without investing a bunch of energy into making a whole quilt. And the best part is that they make great gifts!
What combo of RBD basics would you use for this adorable pillow?
Until later, happy sewing!
Jamie


1 comment
Love the BIG blocks! I am definitely going to make a big block quilt next. After I finish baby quilt I started for grandson 5 years ago…. my bad!