
It's month 10 of the JUMBO BLOCKS ROCK series!
For some fun in 2021, I picked out (12) traditional style blocks, gave them a modern twist, and then upsized them into 18" blocks. Once a month, I will post the free tutorial for one block here on my blog for everyone to make!
Here is the tutorial for the Hidden Star Remix Block from September in case you missed it. You can go to my Tutorials page to see all the other blocks!
BLOCK 10 - HONEYMOON DIAMOND REMIX
This month I took the traditional Honeymoon quilt block, made the arrows on the corners the same color, and swapped around the hourglass sections.
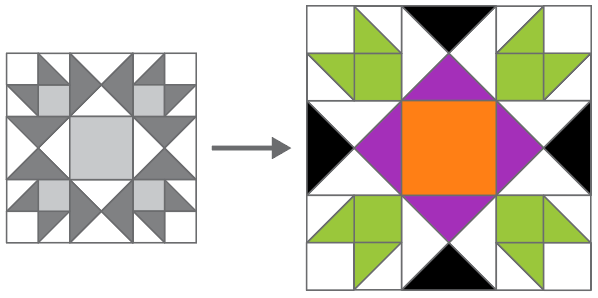
This is an example of what both blocks would look like in a 72" quilt.

BLOCK #10 TUTORIAL
PATTERN NOTES
- Please read through all instructions before beginning.
- Seam allowances are 1/4" unless specified.
- WOF = Width of Fabric; pattern assumes a minimum of 42"
- RST = Right Sides Together
- F8 = Fat Eighth Precut (9" × 21")
- FQ = Fat Quarter Precut (18" × 21")
- Press all seams open (or in preferred direction) unless specified.
FABRIC REQUIREMENTS
This block pattern uses (4) accent fabrics [FABRIC A] and (1) background fabric [FABRIC B]. Below are the requirements to make ONE 18" BLOCK.

NOTE - If you would like to make a SCRAPPY VERSION of this block, just use the exact quantities and sizes of fabric pieces listed below in the cutting directions.
CUTTING DIRECTIONS

From FABRIC A1, cut:
- (1) 8" square
- (4) 3½" squares

From FABRIC A2, cut:
- (1) 7½" square

From FABRIC A3, cut:
- (1) 7½" square

From FABRIC A4, cut:
- (1) 6½" square

From FABRIC B1, cut:
- (1) 8" square
- (2) 7½" squares
- (4) 3½" squares
DIRECTIONS
PART 1 - MAKING THE CORNER UNITS
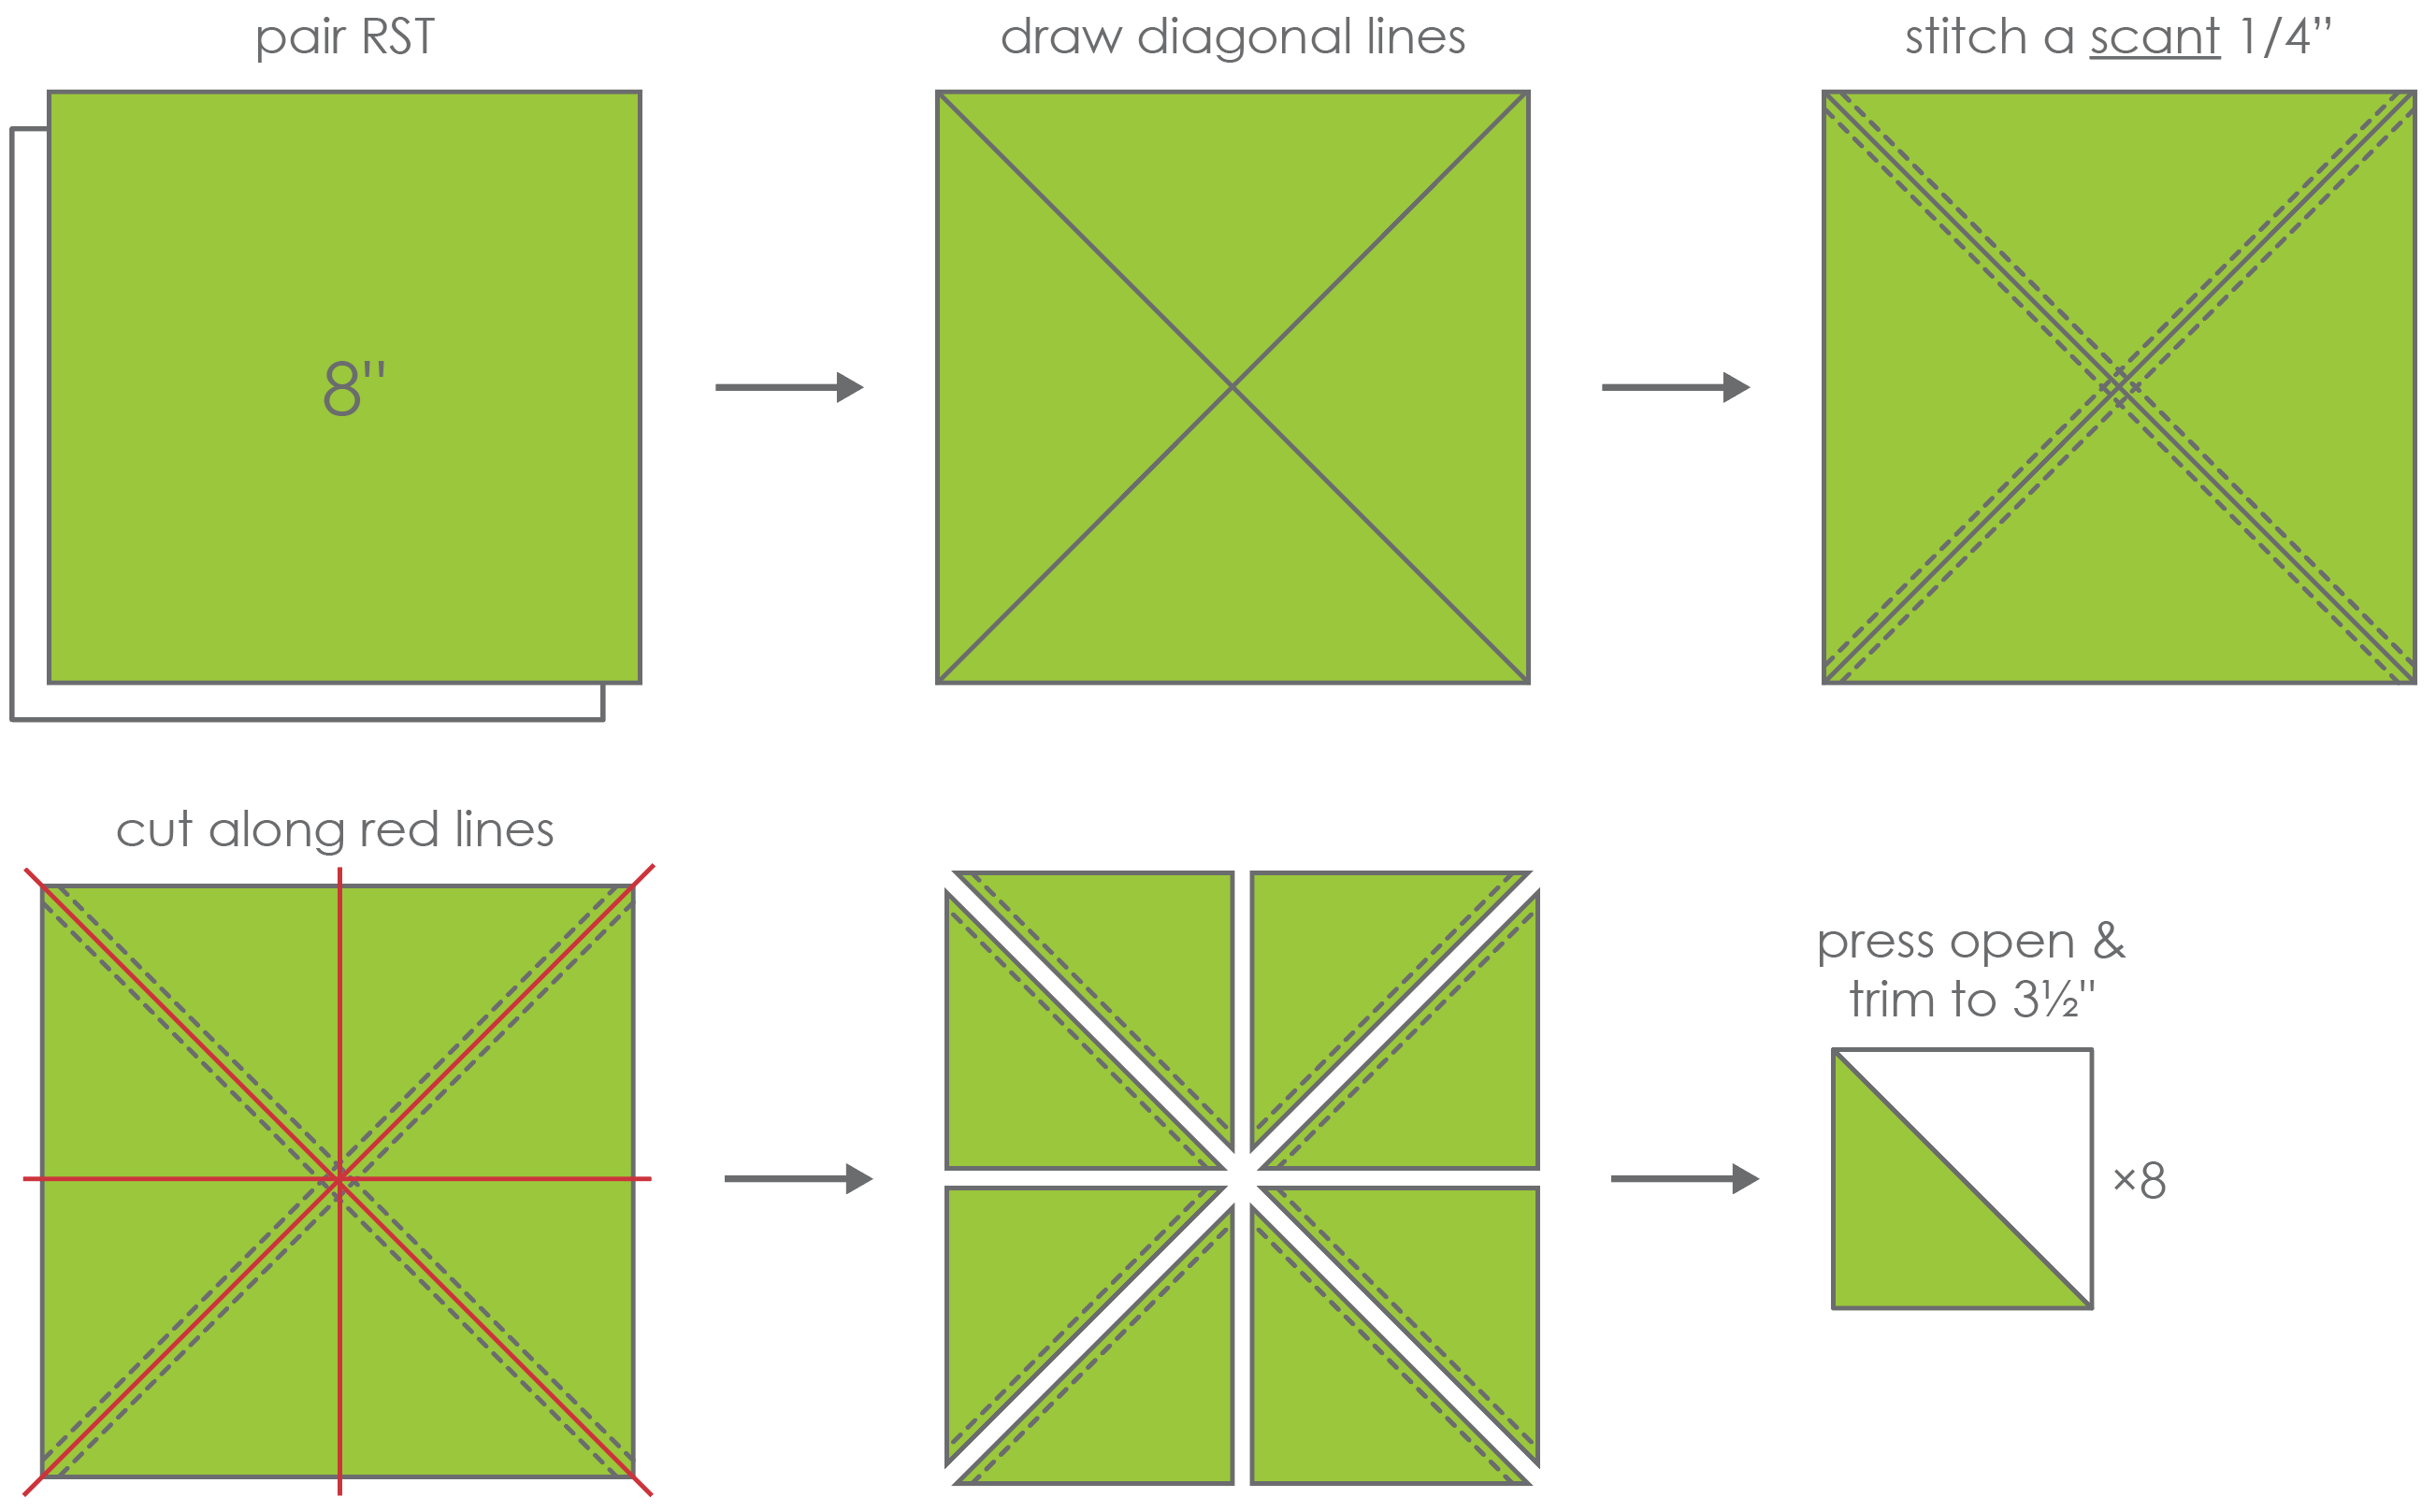
1. Create HSTs using the 8 at a time method (also known as the "Magic 8" method). Pair the A1 and B1 8" squares RST. On the wrong side of one square, draw a diagonal line in each direction using a fabric marker. Stitch a SCANT 1/4" seam on each side of both diagonal lines. Cut along the red lines into 8 HST pieces. Press the (8) HSTs with seams open and trim to 3½".
2. Lay out (2) A1/B1 HSTs, (1) 3½" A1, and (1) 3½" B1 square as shown below. Sew each row together and then sew the rows together.
💡 TIP - If you want to nest your seams here, just press the center seam in the top row to the left and center seam in the bottom row to the right.

3. Repeat STEP 2 to create a total of 4 CORNER UNITS.
PART 2 - MAKING THE CENTER EDGE UNITS
4. Cut (1) 7½" A2, (1) 7½" A3, and (2) 7½" B1 squares diagonally in both directions into FOUR small triangles.

5. Sew (2) small B1 triangles and (1) small A2 and A3 triangles together as shown below. Trim the QST unit to 6½" square.

6. Repeat STEP 5 to create a total of 4 QUARTER SQUARE TRIANGLE units.
PART 3 - BLOCK CONSTRUCTION
7. Lay out the 6½" A4 CENTER SQUARE, the (4) CORNER UNITS, and the (4) CENTER EDGE QST UNITS as shown below.
8. Sew the (3) units in each row together. Press open.
9. Sew the (3) rows together. Press open.

10. Your HONEYMOON DIAMOND REMIX block is now complete! Trim to 18½" square if needed.

If you'd like to turn your block into a pillow, check out THIS POST on sewing an envelope pillow backing.
Until later, happy sewing!
Jamie
Find the other blocks in the #JumboBlocksRock here:
- Block 1 - Antique Tile Remix
- Block 2 - Maple Star Remix
- Block 3 - Amish Star Remix
- Block 4 - Salem Star Remix
- Block 5 - Sunflower Star Remix
- Block 6 - Boxed Basket Remix
- Block 7 - Illinois Diamond Remix
- Block 8 - Variable Star Remix
- Block 9 - Hidden Star Remix
- Block 10 - Honeymoon Diamond Remix
- Block 11 - Nine Patch Pinwheel Remix
- Block 12 - Blocks and Stars Remix
1 comment
I looooooooooooveeeee this!!! Thank you for the tutorial!!!